
To use a portable air compressor safely and effectively, follow five essential steps: check the oil level (if oil-lubricated), connect the correct hose and tool fitting, set the regulator to the required PSI for your task, power on and allow the tank to pressurize before use, and drain the moisture from the tank after every session. For most portable tasks — inflating tyres, running a nail gun, or operating a spray gun — working pressure falls between 90 and 120 PSI, while the compressor tank builds to a higher cutout pressure of 120–150 PSI. Understanding how to read gauges, match CFM output to your tool's demand, and perform basic maintenance separates a compressor that lasts 10+ years from one that fails in two. Whether you are operating a compact portable unit or scaling up to an industrial air compressor, piston air compressor, or screw air compressor for professional applications, the operating principles are consistent — but the stakes and specifications grow significantly.
Understanding Portable Air Compressor Specifications Before You Start
Before operating any air compressor, understanding what the key numbers mean prevents equipment damage and ensures your tools receive adequate airflow. The three specifications that matter most are PSI, CFM, and tank capacity.
PSI (Pounds per Square Inch)
PSI measures pressure — the force at which compressed air is delivered. Most portable compressors have two PSI readings on their gauges: the tank pressure (the stored pressure, which cycles between cutout and cut-in thresholds, typically 120–150 PSI and 90–100 PSI respectively) and the regulated output pressure (the working pressure you set for your tool, typically 70–120 PSI). Never set the regulator above the tool manufacturer's maximum rated PSI — overpressure damages seals, increases wear, and creates safety risks.
CFM (Cubic Feet per Minute)
CFM measures airflow volume — the amount of air the compressor delivers per minute at a given pressure. This is the specification most often overlooked by beginners and the most common cause of tool underperformance. If your tool requires 4 CFM at 90 PSI and your compressor only delivers 2.5 CFM, the tool will operate in short bursts separated by waiting periods as the tank repressurises. A compressor's CFM rating should be at least 1.5× the CFM requirement of the highest-demand tool you plan to run.
Tank Capacity (Gallons / Litres)
Tank capacity determines how long you can run a tool before the compressor motor needs to cycle on again. A 6-gallon tank suits intermittent tasks like brad nailing. A 20-gallon tank supports longer continuous tool use such as spray painting or running an impact wrench. For truly continuous industrial operations, tank size becomes secondary to CFM output — an industrial screw air compressor running at 100+ CFM can supply tools continuously without any stored reservoir.
How to Use a Portable Air Compressor: Step-by-Step
The following procedure applies to standard portable single-stage piston air compressors — the most common type for home, workshop, and light commercial use. Always read the manual specific to your model before first use.
- Position the compressor on a firm, level surface with adequate ventilation. Compressor motors require airflow to cool; never operate in a sealed, unventilated space. Keep the air intake at least 12 inches from walls or obstructions.
- Check the oil level (oil-lubricated models only). Remove the oil fill cap or check the sight glass. Oil should be at the full mark on the dipstick. Use the compressor manufacturer's recommended oil — typically ISO VG 100 non-detergent compressor oil. Never run an oil-lubricated compressor without oil; engine seizure can occur within minutes.
- Inspect the air filter. A clogged intake filter restricts airflow and causes the motor to overwork. Tap out foam or paper filters monthly; replace when visibly blocked or after every 200–300 hours of use.
- Ensure the drain valve is closed. The drain valve (a petcock or ball valve at the bottom of the tank) must be fully closed before operation. An open drain valve prevents pressure from building.
- Connect the air hose to the compressor outlet. Use a quick-connect coupler for fast, secure connection. Ensure the fitting is the correct type — NPT (tapered pipe thread) fittings require thread sealant tape; push-to-connect couplers do not. Tug the hose firmly after connecting to confirm it is locked.
- Set the regulator to zero (fully counterclockwise) before starting. Starting with a high regulator setting can send an immediate pressure surge to a connected tool.
- Switch the compressor on. The motor will run continuously as the tank pressurises from 0 PSI up to the cutout pressure (typically 120–150 PSI). This initial fill takes 1–3 minutes depending on tank size and motor power. The motor will shut off automatically once cutout pressure is reached.
- Set the regulator to the correct working pressure for your tool. Turn the regulator knob clockwise slowly while watching the output gauge until the required PSI is displayed. Common tool pressures are shown in the table in the next section.
- Connect your air tool and begin work. Monitor both gauges — the tank gauge should cycle between cutout and cut-in pressure; the output gauge should remain stable at the set working pressure. If the output pressure drops significantly during tool use, your compressor CFM is insufficient for the demand.
- After use: switch off, release pressure, then drain the tank. Turn the compressor off, disconnect the tool, and open the drain valve to release any remaining air and expel accumulated moisture. Never store the compressor with pressure in the tank long-term — moisture causes internal tank corrosion that leads to structural failure.
Correct PSI Settings for Common Air Compressor Tools and Tasks
Setting the wrong pressure is one of the most common operating errors. Too low and tools underperform; too high and seals fail prematurely, air consumption rises, and tool life shortens. Use the table below as a starting reference — always verify against the specific tool's rating plate or manual.
| Tool / Task | Working PSI | CFM Required | Notes |
|---|---|---|---|
| Car / bike tyre inflation | 30–35 PSI | 0.5–1.5 | Check vehicle door placard for correct tyre PSI |
| Brad nailer / finish nailer | 70–100 PSI | 0.5–1.0 | Start at 80 PSI and adjust for wood hardness |
| Framing nailer | 100–130 PSI | 2.2–2.8 | Higher pressure needed for 3-inch structural nails |
| Impact wrench (1/2 inch) | 90–120 PSI | 4–5 | High CFM demand — requires 20-gallon+ tank |
| Spray paint gun (HVLP) | 25–45 PSI | 6–12 | Highest CFM demand of common portable tools |
| Air ratchet | 90 PSI | 3–4 | Consistent pressure important for torque accuracy |
| Blow gun / air dusting | 30–60 PSI | 1–2 | Never exceed 30 PSI aimed at skin — injury risk |
| Sandblast cabinet | 60–100 PSI | 8–15 | Exceeds most portable compressor capacity; use industrial unit |
Types of Air Compressors: Portable, Piston, and Screw Compared
Portable air compressors represent the smallest end of a broad spectrum. Understanding how they differ from industrial-grade piston air compressors and screw air compressors helps users select the right equipment and understand the operational differences when scaling up.
Portable Air Compressors
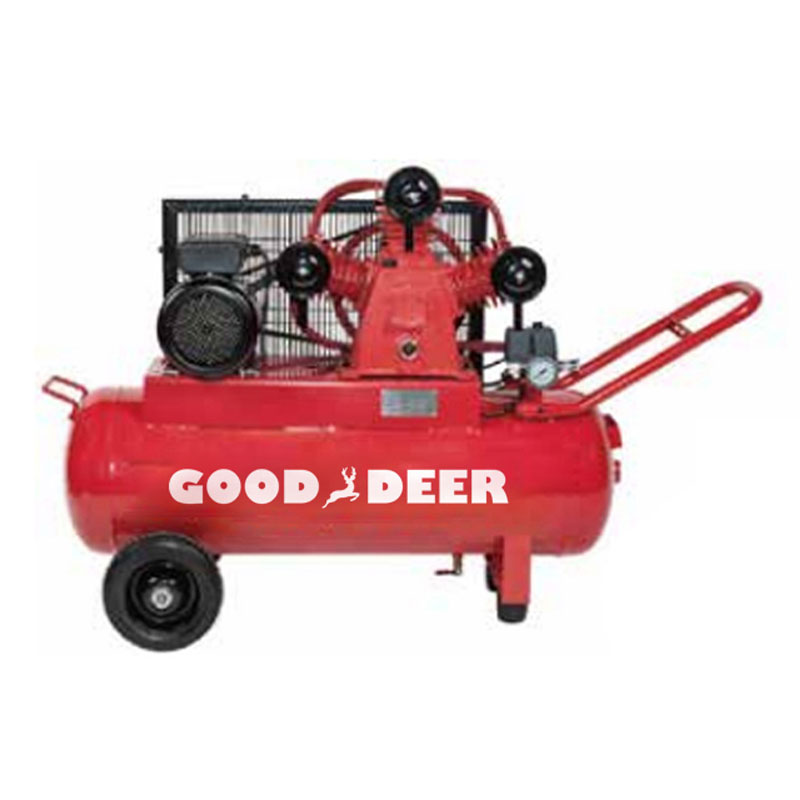
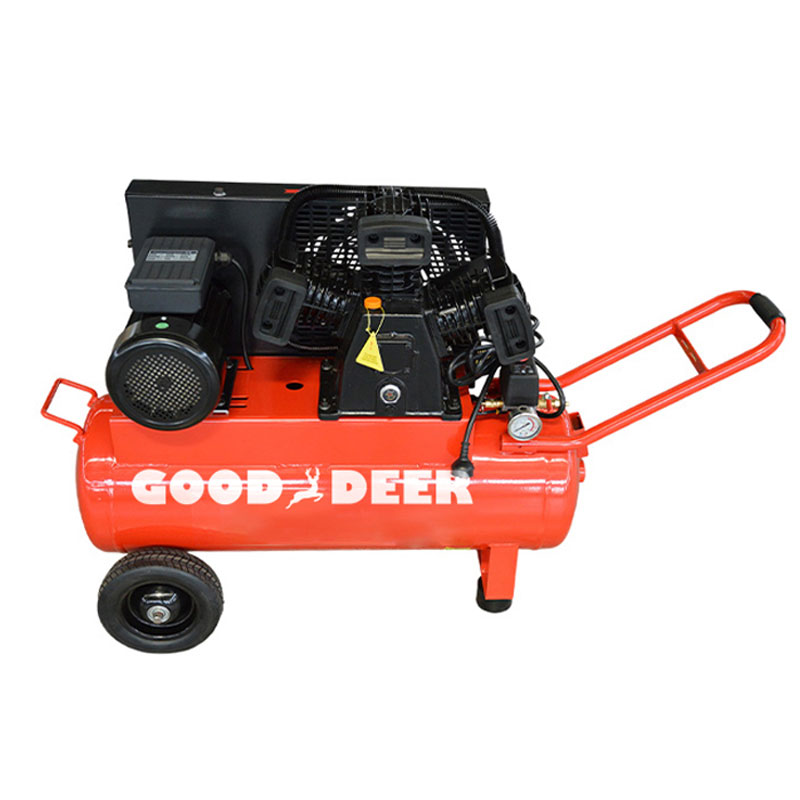
Portable compressors are compact, single-stage piston machines designed for mobility and light-to-medium duty work. They typically produce 1–6 CFM at 90 PSI, with tank capacities of 1–20 gallons and motor ratings of 0.5–2 HP. Oil-free portable compressors are lower maintenance but have shorter service lives (typically 500–1,000 hours) and louder operation. Oil-lubricated portable models are quieter and last 2–3× longer with proper maintenance.
Piston Air Compressors (Reciprocating)
Industrial piston air compressors — also called reciprocating compressors — use one or more pistons driven by a crankshaft to compress air in cylinders, exactly like a portable model but at a dramatically larger scale. Single-stage piston compressors compress air in one stroke to pressures up to 150 PSI. Two-stage models compress in two steps and can reach 175–200 PSI, suitable for industrial sandblasting, plasma cutting air supply, and heavy pneumatic tooling.
Industrial piston compressors range from 5 HP to 30+ HP with CFM outputs of 15–100+ CFM. They are intermittent-duty machines — designed to run for periods and then rest, typically with a 50–75% duty cycle. Running a piston compressor continuously at 100% duty cycle overheats the cylinders and accelerates valve, ring, and bearing wear. For truly continuous industrial air demand, a screw compressor is the correct choice.
Screw Air Compressors (Rotary)
Rotary screw air compressors use two intermeshing helical rotors to compress air continuously rather than in discrete piston strokes. This design delivers smooth, pulsation-free airflow and is rated for 100% continuous duty cycle — they can run 24 hours a day, 7 days a week, unlike piston models. Output ranges from 10 CFM to 3,000+ CFM in industrial configurations, with motor sizes from 5 HP to 500+ HP.
Screw compressors are the dominant choice for manufacturing plants, auto body shops, large construction operations, and any environment where compressed air is a continuous production utility. They are significantly more expensive than equivalent-CFM piston units ($3,000–$50,000+ versus $500–$5,000 for piston models), but the total cost of ownership over a 10–15 year service life is often lower due to higher efficiency and lower maintenance frequency.
| Parameter | Portable Compressor | Piston (Industrial) | Screw Compressor |
|---|---|---|---|
| Typical CFM output | 1–6 CFM | 15–100 CFM | 10–3,000+ CFM |
| Max pressure | 120–150 PSI | 150–200 PSI | 100–175 PSI (standard) |
| Duty cycle | 25–50% | 50–75% | 100% |
| Airflow quality | Pulsating | Pulsating | Smooth, continuous |
| Typical motor size | 0.5–2 HP | 5–30+ HP | 5–500+ HP |
| Price range | $50–$600 | $500–$5,000 | $3,000–$50,000+ |
| Best application | DIY, job site mobility | Workshop, garage, light industrial | Manufacturing, continuous production |
| Noise level | 70–90 dB | 75–90 dB | 60–75 dB |
How to Use an Industrial Air Compressor Safely
Industrial air compressors — whether piston or screw type — operate at higher pressures, larger volumes, and with more serious consequences for errors than portable units. The fundamental operational steps are similar, but the safety requirements and pre-start checks are more demanding.
Pre-Start Checklist for Industrial Units
- Check oil level: Industrial piston compressors require oil at the correct level before every start. Low oil causes immediate, catastrophic bearing failure in high-HP machines. Use compressor-specific lubricant — ISO VG 46 or VG 68 is common for industrial rotary screw units.
- Inspect inlet air filter: Industrial compressors draw large volumes of air. A partially blocked filter causes intake restriction that reduces CFM output and increases motor amperage draw, leading to overheating. Replace filter elements per the manufacturer's hour-based schedule (typically every 500–2,000 hours).
- Verify safety relief valve operation: The pressure relief valve is the last line of defence against tank over-pressurisation. Test it monthly by pulling the ring — it should release air freely and reseat when released. A stuck or missing relief valve on a high-pressure industrial tank is a catastrophic failure risk.
- Check belt tension (belt-driven piston models): Drive belts should deflect no more than ½ inch under firm thumb pressure. Loose belts slip and overheat; overtight belts cause premature bearing wear on both the motor and compressor pump shaft.
- Inspect compressed air pipework and fittings: At industrial volumes and pressures, a failed fitting or cracked pipe section releases enough force to cause serious injury. Inspect all visible pipework, fittings, and connections for corrosion, cracks, or loose joints before startup.
- Verify electrical supply: Industrial compressors over 5 HP typically require three-phase power supply (208–480V). Check phase rotation before first start on a new installation — reverse phase rotation causes the motor to run backwards, destroying pump valves within seconds.
Starting and Operating an Industrial Piston or Screw Compressor
- Open the manual isolation valve between the compressor and the distribution pipework. Ensure all condensate drain valves are closed.
- Start the compressor using the control panel — modern industrial units have a soft-start or star-delta starter to limit inrush current. Allow the unit to reach operating temperature before loading (connecting air demand) — typically 3–5 minutes for screw compressors.
- Monitor the discharge temperature gauge. Screw compressors should operate between 170–200°F (77–93°C) at the discharge. Temperatures above 220°F indicate oil system problems or high ambient temperature and require immediate investigation.
- Check the oil pressure gauge (piston models) or oil level sight glass (screw models) once running. Oil pressure should stabilise within 30 seconds of startup.
- Open the compressed air supply to the distribution system gradually — sudden valve opening in a large industrial system causes pressure hammer that can damage fittings and tools downstream.
Air Quality and Moisture Management
Compressed air contains moisture, oil vapour (in lubricated units), and particulates. For many tools and applications, this contamination is damaging — it rusts internal tool components, causes paint finish defects in spray applications, and can contaminate pneumatic control systems. Managing air quality is as important as managing pressure and flow.
Moisture in Compressed Air
Atmospheric air contains water vapour. When compressed, the volume decreases but the moisture content remains — meaning compressed air is far more humid per unit volume than the ambient air. A compressor drawing in air at 70°F and 50% relative humidity and compressing it to 100 PSI produces condensate equivalent to approximately ½ pint of water per hour of operation in a 20-gallon tank setup. This moisture accumulates in the tank and must be drained after every use. Long-term moisture buildup causes internal tank corrosion that eventually leads to structural failure — a serious safety hazard.
Air Treatment Components
- Inline water separator / moisture trap: Fits between the compressor outlet and the air hose or tool. Removes bulk liquid water through centrifugal separation. Essential for all painting and finishing applications. Drain the bowl after every session.
- Refrigerated air dryer (industrial systems): Chills compressed air to 35–40°F (2–4°C), condensing and removing moisture before it reaches tools or production equipment. Standard on industrial screw compressor installations serving sensitive downstream processes.
- Desiccant dryer: Uses silica gel or activated alumina to adsorb moisture from compressed air, achieving very low dew points (below -40°F/-40°C). Required for instrument air, laboratory applications, and spray painting where any moisture causes finish defects.
- Coalescing oil filter: For oil-lubricated compressors used in applications where oil contamination is unacceptable (food production, medical air, painting). Removes oil aerosol down to 0.01 micron at 99.99% efficiency.
Essential Maintenance Tasks to Keep Your Compressor Running Reliably
Maintenance is the single biggest factor separating compressors that last 15 years from those that fail in 3. The following schedule applies primarily to portable and small industrial piston compressors — refer to the manufacturer's service manual for specific intervals on your model.
| Task | Frequency | Why It Matters |
|---|---|---|
| Drain moisture from tank | After every use | Prevents internal tank corrosion and structural failure |
| Check oil level (lubricated) | Before each use | Low oil causes immediate pump seizure |
| Clean / inspect air filter | Monthly / every 50 hours | Clogged filter reduces CFM and strains motor |
| Change compressor oil | Every 200–300 hours or annually | Degraded oil loses lubricity; increases wear rate |
| Inspect / test safety relief valve | Monthly | Stuck valve allows dangerous over-pressurisation |
| Inspect drive belt (belt-driven) | Every 3 months / 300 hours | Worn belts slip, reducing output; broken belts stop operation |
| Inspect intake and discharge valves | Annually / every 500–1,000 hours | Leaking valves reduce compression efficiency significantly |
| Inspect tank for corrosion / rust | Annually | Corroded tanks must be replaced — do not use |
Safety Rules Every Air Compressor User Must Follow
Compressed air carries serious injury and fatality risk when misused. A burst tank, a failed fitting at 120 PSI, or compressed air entering the bloodstream through broken skin can each cause life-threatening harm. The following rules apply to every user at every skill level.
- Never aim compressed air at a person's body. Even at 30 PSI, an air jet directed at broken skin can inject air into the bloodstream — a condition called air embolism that is potentially fatal. Industrial jurisdictions in many countries prohibit using compressed air for personal cleaning for this reason.
- Never exceed the rated pressure of any fitting, hose, or tool in the system. The maximum pressure rating must be the minimum across all connected components. A 300 PSI-rated hose connected to a 90 PSI-rated tool fitting is only safe to 90 PSI.
- Wear eye and ear protection. Compressors operating at 75–90 dB cause hearing damage over sustained exposure. Flying debris from pneumatic tools and high-pressure air jets creates serious eye injury risk.
- Never modify or disable the pressure relief valve. The relief valve is a statutory safety device on pressure vessels. Tampering with or defeating it is illegal in most jurisdictions and creates catastrophic tank rupture risk.
- Depressurize the system before changing fittings, hoses, or tools. Always close the tank isolation valve, release regulator pressure to zero, and confirm with the gauge before disconnecting any pressurised component.
- Inspect hoses before every use. Air hoses under pressure that suddenly fail (due to cuts, abrasion, or age-related cracking) whip violently and can cause severe impact injuries. Never use a cracked, kinked, or damaged hose.
- Keep the compressor away from flammable materials and gases. The motor and compression process generates heat. In environments with solvent vapours, paint fumes, or fuel — common in body shop and spray environments — position the compressor in a separate, ventilated space and pipe compressed air through the wall.
Troubleshooting Common Portable Air Compressor Problems
Most compressor performance issues have identifiable causes that can be diagnosed methodically before calling for service.
| Symptom | Probable Cause | Remedy |
|---|---|---|
| Compressor won't build pressure | Open drain valve, failed intake or discharge valve, blown gasket | Close drain valve; inspect and replace valves |
| Motor runs continuously without reaching cutout pressure | Air leak in system, worn piston rings, clogged filter | Check all fittings with soapy water; replace rings or filter |
| Output pressure drops rapidly during tool use | CFM demand exceeds compressor output; tank too small | Use lower-demand tool; upgrade to larger compressor |
| Excessive noise / knocking | Loose flywheel, worn bearings, low oil level | Check oil; tighten flywheel bolt; inspect bearings |
| Oil in the air line | Overfilled oil reservoir, worn piston rings | Check oil level; fit coalescing filter; replace rings if severe |
| Compressor overheating / thermal cutout tripping | Duty cycle exceeded, blocked ventilation, low oil | Allow to cool 20 minutes; improve ventilation; check oil |
| Safety relief valve constantly blowing | Faulty pressure switch, damaged check valve | Replace pressure switch; inspect and replace check valve |
Choosing the Right Compressor for Your Application
Selecting the correct compressor type from the outset prevents the frustration and cost of equipment that cannot meet the demand placed on it.
- Choose a portable compressor (1–6 CFM, 6–20 gallon tank) for tyre inflation, trim nailing, brad nailing, inflation tasks, and occasional impact wrench use. A 6-gallon, 150 PSI, 2.6 CFM unit like the California Air Tools 6310 covers the majority of home and job site portable needs.
- Choose an industrial piston air compressor (15–60 CFM, 60–120 gallon tank) for auto body work, framing, multiple simultaneous tools, and small workshop production. A two-stage, 60-gallon, 175 PSI, 15 CFM piston compressor is a standard auto shop workhorse.
- Choose a screw air compressor when compressed air is a continuous production utility — manufacturing lines, CNC operations, large-scale painting, or facilities running multiple high-demand tools simultaneously around the clock. A 10 HP screw compressor delivering 40 CFM at 125 PSI continuously replaces the equivalent of three or four large piston units with better energy efficiency and lower maintenance frequency.
As a general sizing rule: calculate the total simultaneous CFM demand of all tools you plan to run at once, then select a compressor rated at 1.25–1.5× that figure. This buffer accounts for pressure drop in hose runs, filter losses, and future tool additions without requiring immediate equipment upgrades.


